Build a multi-step approval chain that tracks its own progress
Send an expense claim through two approvers in sequence, using AI to flag anything unusual before it reaches a human, and keep a live record of exactly where each claim is stuck.
What this looks like
One step on screen at a time. Read it, do it, tap Next.
Build a multi-step approval chain that tracks its own progress
Step 1 of 13
Build the claim submission form
Create a workflow and add an n8n Form Trigger for employees to submit a claim.
Checkpoint
Submitting the form produces a complete item.
Before you begin
Tick these off as you sort them. Stopping halfway to create an account is how a fifteen-minute build becomes an hour.
0 of 10 ready
Ticks are saved on this device, so you can come back to them.
- Know-how
Decide exactly who approves first and who approves second, and what happens if either rejects. Draw it out before you build it.
- API key
Used to flag claims that look unusual — high amounts, vague descriptions, or mismatched categories — before a human reviews them.
- Have ready
Columns: ClaimID, Employee, Amount, Stage, Status, Approver1, Approver1Decision, Approver2, Approver2Decision, Flagged.
- Have ready
The first approver is usually a line manager; the second is usually finance. Confirm both people are expecting this change.
- Account
Used to record and update the chain's progress after every decision.
- Account
Both approvers receive their requests from this address, in sequence rather than at the same time.
- Time
This is one of the more involved builds in the library — the state tracking takes care to get right.
The basics — ticked once, remembered everywhere
- Account
Either the hosted version or a self-hosted install. Everything here works the same on both — the only visible difference is the shape of your webhook URLs.
Create a workspace - Know-how
Adding a node, connecting two of them, and pressing Execute. If any of that is new, the free primer covers it in about ten minutes.
- Credential
You will paste at least one secret during setup. A password manager beats a notes app, and it stops you pasting a live key into a chat window by accident.
The shape of the workflow
The nodes you will end up with, left to right, in the order you add them.
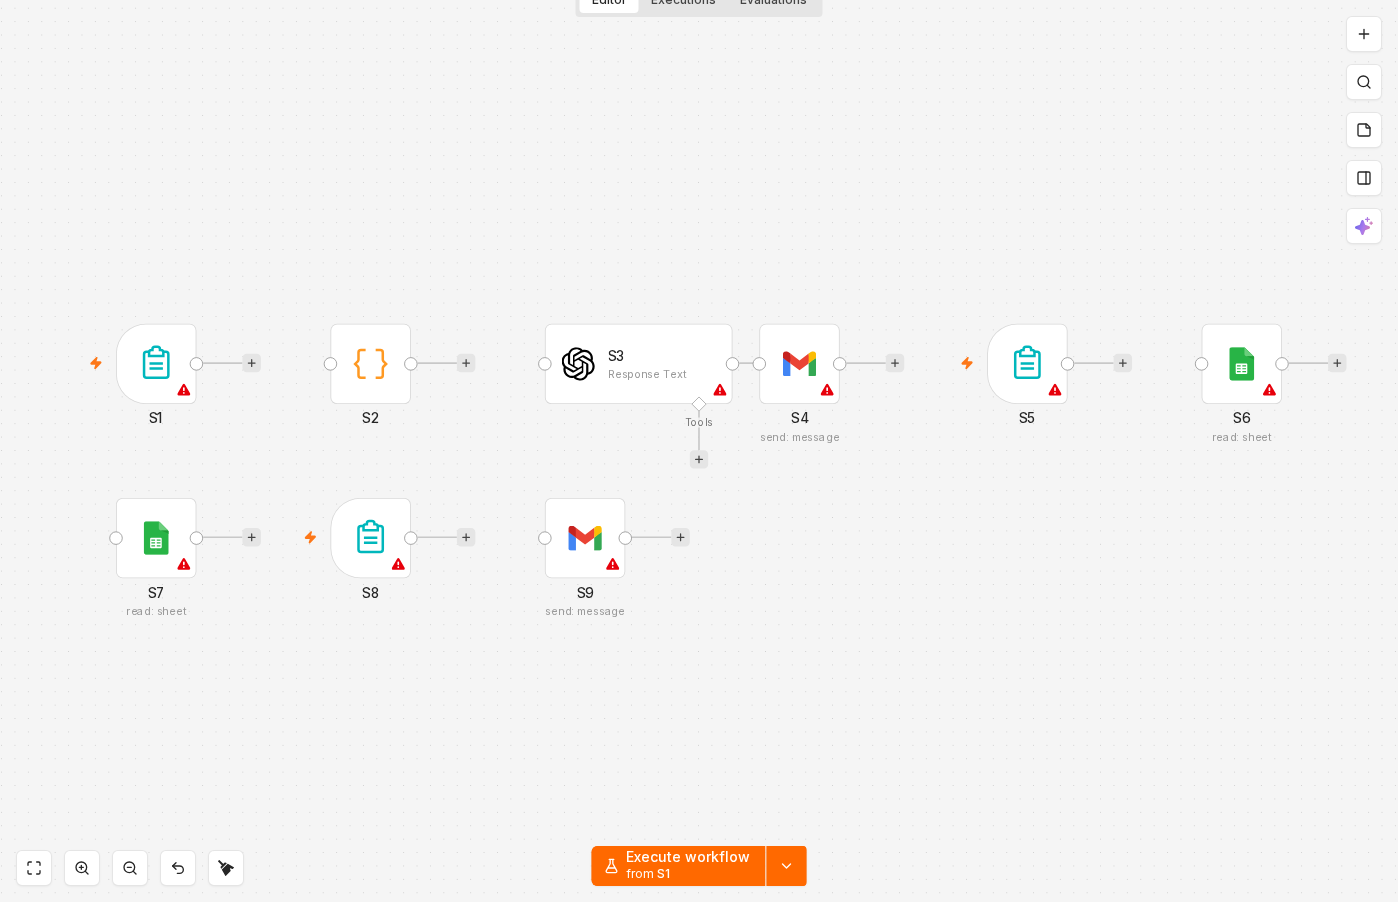 4 things to set here
- 1n8n Form Trigger — the trigger — everything starts here
- 2Code — Give the claim an ID and initialise its state
- 3OpenAI — Screen the claim with AI before it reaches a human
- 4Gmail — Log the claim and send it to the first approver
Skip the node hunting
Import a starter file with every node for this build already on the canvas, named after its step and wired in order, each one carrying a sticky note with the values to enter. You still connect your own accounts and fill the fields — that is what the walkthrough takes you through — but you never start at a blank canvas.
In n8n: Workflows → Import from file.
What you will build
Jump straight to any step, or print the list and tick it off beside your n8n tab.
- 1Build the claim submission form
- 2Give the claim an ID and initialise its state
- 3Screen the claim with AI before it reaches a human
- 4Log the claim and send it to the first approver
- 5Capture the first approver's decision
- 6Move approved claims to the second approver
- 7Stop the chain immediately on rejection
- 8Capture the second approver's decision
- 9Notify the employee of the final outcome
- 10Test the full chain, then activate
- 11Run a claim through both approvals
- 12Reject at the first stage
- 13Submit a deliberately vague claim
If something goes wrong
Everything ready?
Start walkthrough